Digitizing…Did you know???
Hi all!!!
So I’m planning out my first video, but I didn’t want to hold back on a simple, yet handy little detail I recently learned.
Many embroidery machines are flat embroidery and most of these machines have square or rectangular hoops. Many multi-needle machine owners upgrade their hoops to Mighty Hoops, Maggie Hoops, etc, which are square or rectangular in shape. Well, if you are using Embrilliance to digitize like I am, you may have noticed that the hoops are all rectangular. What happens when you’re digitizing for someone that has round and oval hoops? When I first got my BAi MIRROR 1501, it came with a bunch of round hoops. How do I know if my design will fit the smallest hoop I have? You have to admit, you just get more space with an 8” square hoop than you do with an 8” round hoop. Here, I give you the solution!
Let’s start on the Embrilliance desktop interface…
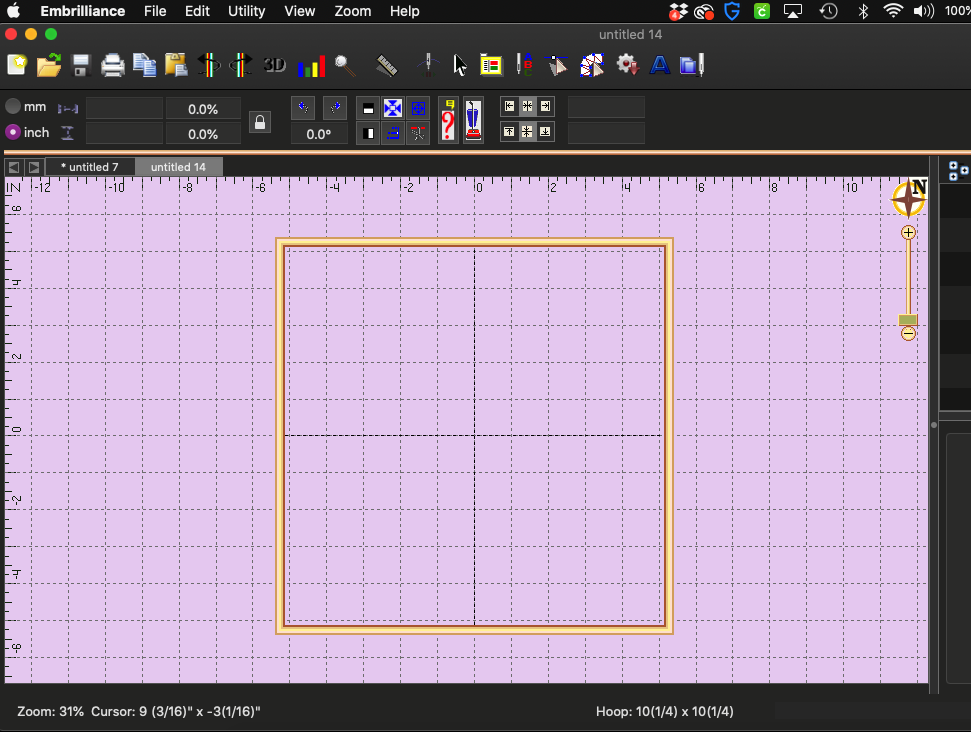
When you open your Embrilliance desktop application, you will see a square hoop (this is the last hoop you used or the hoop size/shape you set up in the application settings).
From here, click on the little yellow folder at the top of your screen. This will open up the settings and the first thing you should see is your hoop settings.
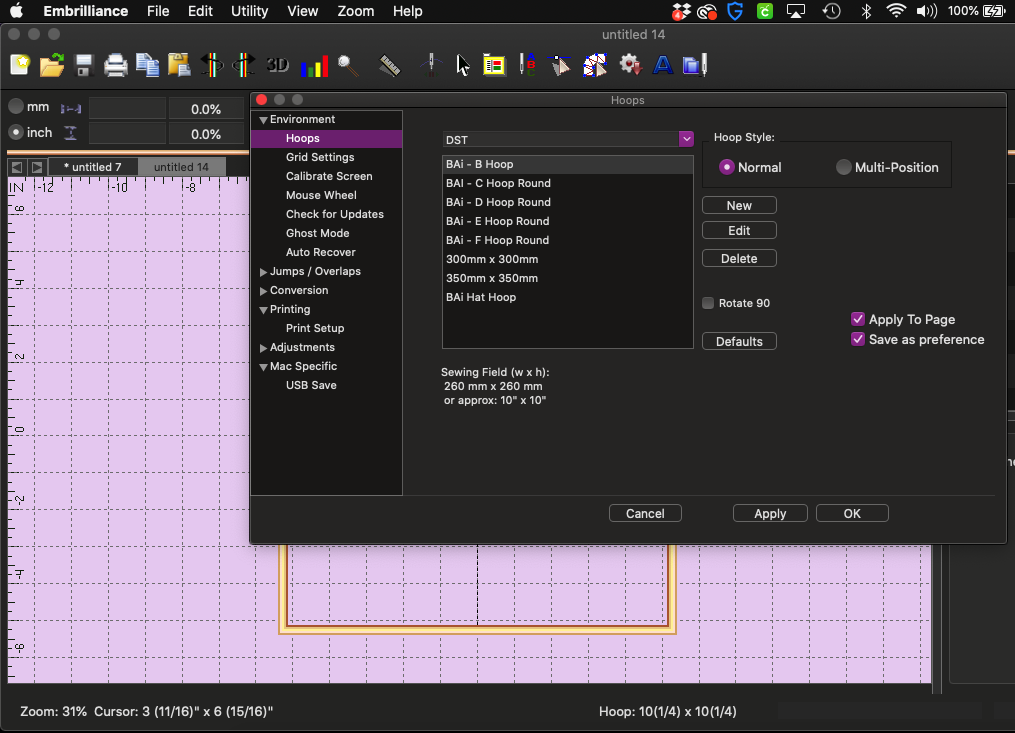
From here, select the hoop size you want to make a round hoop. If you need to create a new hoop, click the “New” button and you can fill in the name you want for this hoop and the dimensions (length and width). If you already have a hoop set up for the size you want, select the “Edit” button.
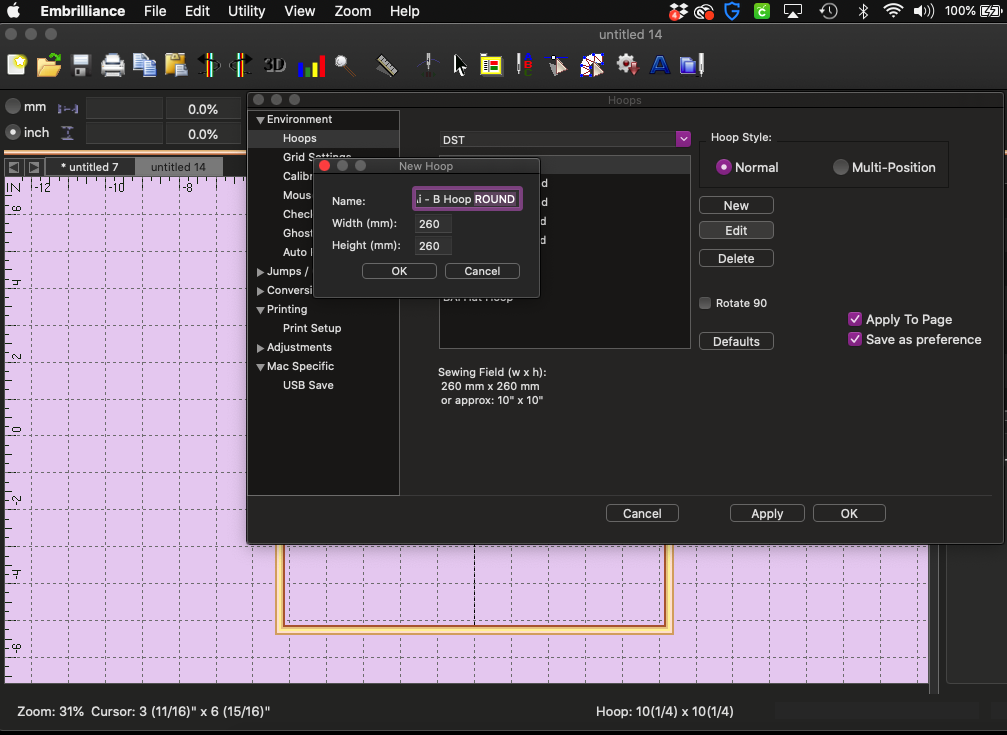
Do you see in the image above where I typed the words “ROUND” next to the name of this hoop? Good, keep following along kiddos. Be sure to put the word “Round” in the name of your hoop (preferably at the end of the name and it doesn’t have to be all capitalized like I did). Once you’ve added this, click “Ok”. This will save the hoop settings you just made. Now, you may click “Apply” at the bottom of this dialog box to apply this change to the current blank creation screen or just click “Ok” to save it for later.
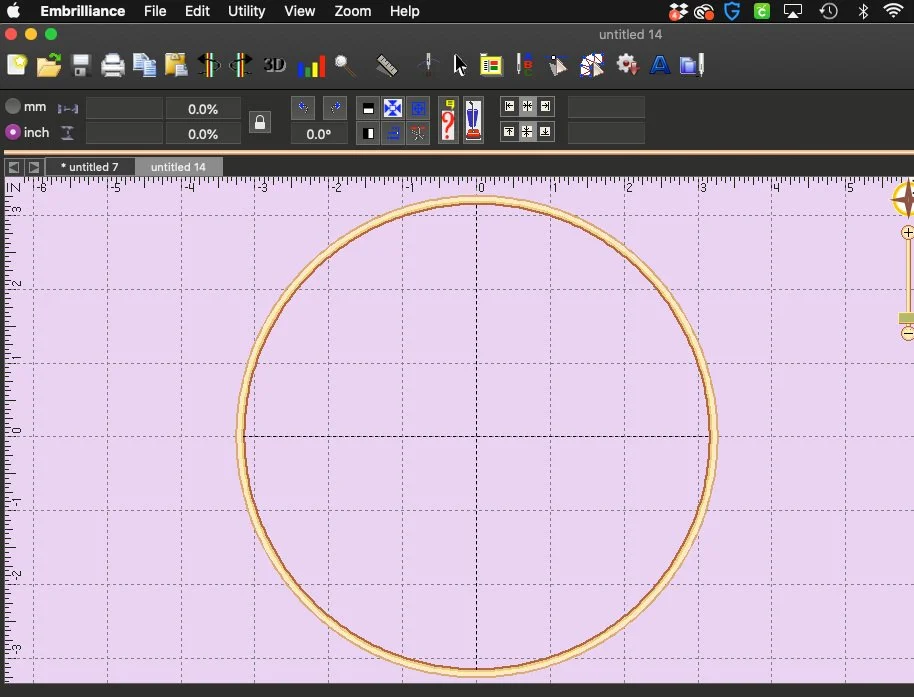
Now when you close the dialog box by clicking “ok”, you should see your newly created ROUND embroidery hoop. So now you can create your designs and know whether or not they will fit in you or your customer’s specific hoop shape and size.
I really hope this helped someone, because I was SHHHHOOOOOOOK when I found this out. It was like MAGIC, so you know I had to share it with you all.